
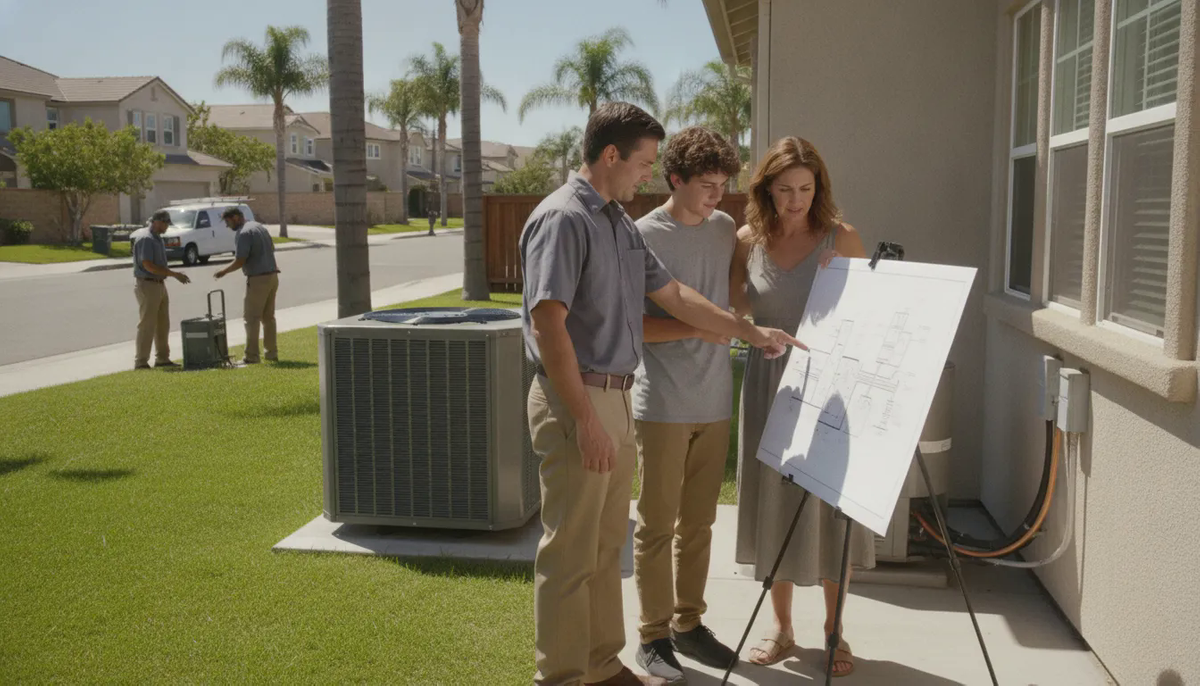
Installing central air in the Bay Area is not simply a matter of choosing an equipment size and connecting a few lines. A successful project must account for your home's cooling load, existing ductwork, available installation space, local microclimate, and any permit or HOA requirements. Historic homes, compact floor plans, and neighborhoods with strict exterior guidelines can make those details especially important.
Central AC installation Bay Area projects typically involve evaluating the home, calculating the cooling load, selecting a compatible system. Preparing or improving ductwork, installing the indoor and outdoor equipment, and commissioning the system by verifying airflow and refrigerant charge. The right process helps deliver dependable comfort and efficient operation.
Ready to get started? Schedule your free estimate online or call (833) 206-2477 to discuss your home with our team. This guide explains the decisions homeowners should understand before approving an installation, beginning with the two central AC configurations most commonly considered for a home.
Central AC Installation Bay Area: Understanding Central AC: Split-System vs. Packaged Units
Most central air conditioning installations fall into one of two configurations: a split-system or a packaged unit. The right choice depends on your home's existing equipment, available space, duct layout, and local installation requirements. Understanding the difference makes it easier to compare recommendations during a central AC installation in the Bay Area.
Split-system air conditioners
A split system divides the equipment between two locations. The outdoor condenser contains the compressor, fan, and heat exchanger. Inside the home, an air handler or furnace cabinet contains the indoor heat exchanger and blower. Refrigerant lines connect the indoor and outdoor components, while the blower moves cooled air through the ductwork.
This arrangement is common in homes that already have a forced-air furnace. The existing furnace may provide the indoor blower and duct connection, while the new outdoor condenser supplies cooling. The equipment still needs to be matched and sized correctly for the home, rather than selected by replacing only one component. The U.S. Department of Energy describes split systems as having an outdoor unit with the heat exchanger, fan, and compressor, plus an indoor unit with the heat exchanger and blower. Learn more about central air conditioning components from the Department of Energy.
Packaged central air conditioning units
A packaged system places the major components in one cabinet. The heat exchanger, compressor, fan, and blower share a single enclosure, which is typically installed on a roof or on a concrete slab beside the home's foundation. Ductwork connects the cabinet to the home's supply and return air distribution system.
Packaged units can be practical when indoor equipment space is limited or when a home already uses a rooftop HVAC arrangement. However, the installer must evaluate cabinet access, service clearance, weather exposure, drainage, and the condition of the connected ductwork. A single cabinet does not eliminate the need for careful design.
When a heat pump may be worth considering
Bay Area homeowners with an existing furnace but no air conditioner may also want to compare a heat pump with a conventional split-system AC. A heat pump can provide both heating and cooling, potentially replacing the need to add cooling equipment while continuing to use the home's duct system. The best option depends on the furnace's condition, electrical capacity, comfort goals, and the home's heating needs. A qualified assessment should compare both paths before equipment is selected.
Why Proper Sizing Is the Most Critical Step
Choosing a central air conditioner is not simply a matter of matching equipment to the square footage of a home. A reliable central AC installation Bay Area plan begins with understanding how much cooling each home actually needs, how heat enters the building, and how existing ductwork can deliver conditioned air. Bay Area homes vary widely, from older properties with limited insulation to newer, tighter construction, and coastal, inland, and peninsula microclimates can create very different cooling loads.
Manual J turns assumptions into a defensible design
An ACCA Manual J load calculation evaluates the home's characteristics rather than relying on a rule of thumb. The process considers factors such as conditioned floor area, window size and orientation, insulation, air leakage, ceiling height, occupancy, and local design conditions. The resulting load helps determine the capacity the system needs during demanding conditions without automatically selecting the largest available unit.
Manual J is followed by equipment selection using ACCA Manual S protocols. Together, these standards connect the home's measured cooling requirement to equipment that can meet it. Ortiz uses ACCA protocols as part of its design process. Helping ensure that the selected system is appropriate for the property and not based on an oversimplified ton-per-square-foot estimate.
Why oversized equipment creates comfort problems
Oversizing may sound safe. But a unit that is too large can cool the thermostat location quickly and shut off before it runs long enough to remove humidity or distribute air evenly. Frequent cycling can also create temperature swings, unnecessary wear, and rooms that never feel consistently comfortable. According to the U.S. Department of Energy's Building Science Education program. More than half of residential HVAC systems in the United States perform poorly because of installation issues that include oversized equipment and improperly designed or installed duct systems. Read the quality-installation guidance for the technical context behind these findings.
Proper sizing also gives the installer a stronger basis for evaluating whether existing ducts, returns, electrical service, and thermostat placement can support the new system. That matters especially in older Bay Area homes, where the equipment may be newer than the distribution system around it. If you are still deciding whether replacement is warranted, review when to consider central AC installation before requesting a design.
Installation quality affects the return on the equipment
Sizing is only the first design decision. Quality installation includes following manufacturer requirements, matching airflow to the system, sealing duct connections, and commissioning the equipment after startup. The same federal guidance estimates that improved installation can save homeowners between 18% and 36% on air-conditioning and heat-pump energy use. Those savings are not guaranteed for every home, but they show why a lower-quality installation can undermine the efficiency promised by the equipment label.
A load calculation, documented equipment selection, and careful commissioning give you useful questions to ask before work begins. Ask what method was used to size the system, whether the ductwork was evaluated, and how performance will be verified at completion. This process creates a cooling system designed around your home rather than a product chosen by habit.
The Central AC Installation Timeline: What to Expect
A well-planned installation is more than placing a new condenser beside the house. In the Bay Area, the process may also need to account for compact lots, older construction, varied microclimates, and existing ductwork. Here is what a homeowner can expect from a professional central AC installation.
Inspect the home and calculate the cooling load. The contractor reviews the home's size, insulation, windows, orientation, and existing HVAC equipment. An ACCA Manual J load calculation helps determine how much cooling the home actually needs, rather than selecting a unit based only on square footage. Equipment selection can then follow the ACCA Manual S protocol. The result should reflect the home's actual conditions, including warmer inland areas or cooler coastal exposure. The U.S. Department of Energy explains why proper sizing matters.
Select compatible equipment. The installer matches the outdoor condenser, indoor coil or air handler, furnace interface, and controls. Compatibility affects efficiency, airflow, warranty requirements, and future serviceability.
Assess the ductwork and air distribution. The team checks duct size, condition, insulation, and accessible connections. Ducts should be sized using a recognized method such as ACCA Manual D, sealed with mastic, and insulated where needed. The installer also confirms that the home has enough supply and return registers for balanced air delivery.
Place the indoor unit. The coil or air handler is positioned to connect cleanly to the supply and return ducts and to allow access for filter changes and future maintenance. In an older Bay Area home, this may require careful coordination around tight closets, crawl spaces, or existing furnaces.
Position the outdoor condensing unit. The location must provide unobstructed airflow and enough service clearance. It should also limit noise impact on the household and nearby neighbors. A level, stable base helps protect the equipment and supports proper drainage.
Connect refrigerant lines and condensate drainage. The installer connects the indoor and outdoor components with correctly sized refrigerant lines, seals the penetrations, and verifies that condensate can drain safely. Every connection should be checked for leaks before operation.
Complete the electrical work. The contractor verifies circuit capacity, disconnect requirements, wiring, grounding, and protection for the new equipment. Any needed electrical changes should be identified before the system is energized.
Install and locate the thermostat. A thermostat should be centrally located and away from direct sunlight, windows, supply registers, kitchens, and other heat sources. This helps it read representative indoor conditions instead of cycling the system based on a misleading hot or cold spot.
Commission, charge, and test the system. Before handoff, the installer verifies the manufacturer's specified refrigerant charge and airflow rate, then checks supply and return temperatures, system operation, drainage, controls, and register airflow. This final testing is essential because a system can run while still delivering uneven comfort or poor efficiency if airflow and charge are not correct.
Ask for a clear explanation of what was tested and how to change filters, use the thermostat, and schedule maintenance. That documentation gives you a practical baseline for protecting the performance of your new system.
Ductwork in Bay Area Homes: Special Considerations
In many Bay Area homes, the ductwork deserves as much attention as the air conditioner itself. Older and historic homes may have tight framing, additions built at different times, limited chases, or existing ducts that were designed for another type of heating system. A quality installer should assess the condition, layout, capacity, and accessibility of the existing ductwork before recommending a new central AC system. Installing a larger unit without confirming that the ducts can move the required airflow can leave some rooms uncomfortable while adding strain to the equipment.
Keep ducts inside the conditioned space when possible
Ducts lose less energy when they run through areas that are already heated or cooled. The U.S. Department of Energy recommends installing ductwork within conditioned spaces whenever possible, rather than placing it in unconditioned attics or garages. In an older Bay Area home, moving ducts may not always be practical. But the installer should identify the tradeoffs and design the system around the home's actual structure. Ducts located outside the conditioned envelope need careful insulation and sealing to limit energy loss.
Seal and insulate every accessible connection
Small gaps at seams, plenums, registers, and transitions can reduce the amount of cooled air that reaches living spaces. Duct mastic is the appropriate sealing material identified in the installation guidance from the U.S. Department of Energy, rather than relying on ordinary cloth-backed duct tape. Proper insulation is also important when ducts pass through unconditioned areas. During the assessment, the contractor should look for crushed sections, disconnected runs, damaged insulation, and return-air restrictions.
Size the duct system for the selected equipment
Duct sizing should follow a recognized method such as ACCA Manual D. This accounts for the home's layout, the length and shape of each run, available static pressure, and the airflow the selected equipment requires. Improperly designed, sized, or installed ducts do not operate as efficiently as they should, according to the Building Science Education Solution Center. For a central AC installation Bay Area homeowners can rely on, the duct evaluation should happen before equipment is finalized, not after the unit is already ordered.
Permits, HOA Rules, and Title 24 Energy Code
Permits and approvals are part of planning a compliant central air conditioner installation in the Bay Area. Requirements vary by city and project scope, but most HVAC installation work requires a building permit or mechanical permit from the local jurisdiction. The permit process helps confirm that the equipment, electrical connections, refrigerant work, and installation location meet applicable safety requirements. It also creates a record that may matter when you sell or remodel the home.
Check permit requirements before equipment is ordered
A professional installer should identify the permits required for your address, prepare the relevant documentation, and coordinate inspections when they apply. This is especially important in older Bay Area homes, where an existing electrical panel, duct system, or equipment platform may not support a straightforward replacement. The installation plan should account for access, clearances, drainage, noise, and safe equipment operation rather than treating the outdoor condenser as an afterthought.
HOA approval may affect outdoor unit placement
Homeowners in condominiums, townhomes, and planned communities may need written HOA approval before installing or relocating exterior equipment. Many Bay Area associations have strict rules about visibility from streets, shared walkways, neighboring units, and common areas. They may request equipment dimensions, color information, screening details, a site plan, or photographs showing how the condenser will appear after installation.
Do not assume that city approval replaces HOA approval. Ask your association for its architectural-review requirements early, then share the proposed location with your installer. A thoughtful placement can preserve airflow and service access while reducing visual impact and avoiding preventable delays.
Title 24 and available incentives
California's Title 24 energy code sets energy-performance requirements for new air conditioning installations. The selected system and installation approach must meet the efficiency levels and other requirements that apply to the project. Code compliance is not limited to choosing a high-efficiency model. Equipment selection, controls, ductwork, and commissioning all influence whether the completed system performs as intended.
Professional installers bring the expertise needed to navigate recognized installation standards, local code requirements, and available utility programs. Depending on eligibility and equipment choice, homeowners may also find rebates such as HEEHRA incentives for qualified heat pumps. Ask which programs are currently available and confirm eligibility before relying on a rebate in your project budget. Ortiz can manage these compliance details as part of your professional central AC installation services, helping you move from equipment selection to a properly documented installation.
Should You Consider a Heat Pump Instead?
For a Bay Area home that already has a furnace but no air conditioner, a heat pump deserves serious consideration. Unlike a conventional central AC system, it can provide both cooling and heating by moving heat rather than creating it through combustion. The U.S. Department of Energy specifically identifies a heat pump as an alternative to a split-system air conditioner in this situation. Learn more about how central air conditioning and heat pump systems work.
The better choice depends on your existing equipment, comfort goals, electrical service, and installation plans. Use this comparison as a starting point, then have the home and ductwork evaluated before selecting equipment.
Central AC and heat pump comparison for Bay Area homes Consideration Central AC Heat pump Function Cooling only. A separate furnace or other heating system is needed for winter. Heating and cooling in one system. It can work with existing ductwork when the system is properly designed. Efficiency High-efficiency models can reach up to 22 SEER2, depending on the equipment selected. Inverter models can offer highly efficient operation and precise temperature control. Some models reach efficiency levels higher than conventional AC systems. Warranty Qualifying systems may include a 10-year parts warranty. Qualifying inverter-driven heat pumps may include up to a 12-year parts warranty. Upfront cost Often simpler when the home already has a suitable furnace and only needs cooling. May cost more initially because it provides two functions, although available rebates and long-term efficiency can affect the overall value. Best use case Homes that need dependable cooling while retaining a separate furnace for heating. Homes seeking one heating and cooling solution, especially those adding cooling to an existing furnace setup.
Where dual-fuel systems fit
If you want heat pump efficiency but prefer a furnace for the coldest conditions, ask about a dual-fuel configuration. Carrier offers dual-fuel options that coordinate a heat pump with a gas furnace, allowing the system to switch between heat sources based on operating conditions. This approach can be useful when a home has an existing furnace that remains in good condition.
Inverter technology also matters. Rather than cycling between only full output and off, an inverter-driven heat pump can adjust capacity more precisely to the home's demand. That can support steadier indoor temperatures and efficient operation, particularly across the Bay Area's varied microclimates. Efficiency ratings and warranty terms vary by model, so compare the complete system, not just the outdoor unit.
When planning central AC installation Bay Area homeowners should compare both paths if heating equipment is aging or absent. A load calculation, ductwork review, and equipment-specific estimate will show whether straightforward AC or a heat pump better fits the home.
Frequently Asked Questions
How much does central AC installation cost in the Bay Area?
Most Bay Area homeowners spend between $8,000 and $18,000 or more, depending on home size, system type, ductwork, electrical needs, and installation complexity. A site evaluation is the best way to identify the equipment and scope your home requires. See our guide to Bay Area AC installation costs for additional planning context.
What factors affect the price of central AC installation?
The main factors are the cooling load, equipment efficiency, indoor and outdoor unit configuration. Condition and location of the ductwork, electrical upgrades, access to the work area, and permit or HOA requirements. A proper design should account for the home's measured load and existing air-distribution system rather than relying on square footage alone.
How do I know if central air conditioning is right for my home?
Central AC may be a good fit when your home already has usable ducts. You want consistent cooling across multiple rooms, and the electrical and outdoor-unit location can support the system. If you have a furnace but no air conditioner, compare a heat pump as well because it can provide both heating and cooling efficiently, according to the U.S. Department of Energy.
What should be checked after the installation is complete?
The installer should verify refrigerant charge and airflow against the manufacturer's specifications, confirm that supply and return registers distribute air properly, and check that ducts are sealed. The thermostat should be centrally located away from windows, supply registers, and other heat sources. These commissioning checks help confirm that the system is operating as designed.
Ready to Plan Your Central AC Installation?
A well-planned installation can help your home stay comfortable across Bay Area microclimates while keeping equipment choices aligned with your needs. Schedule a free estimate for a new central AC installation with Ortiz Heating and Air Conditioning, Inc. Call (833) 206-2477 to discuss your home and the next steps with our team.